Essential Guide to Building Your Own PC
Intro
Building a personal computer can seem daunting at first. However, armed with the right knowledge and resources, anyone can successfully assemble a machine that meets their needs. This guide aims to provide clarity and detail on the multitude of factors involved in the PC building process, from understanding the components that make up a PC to the actual assembly and setup. Through meticulous explanations and practical tips, readers will find themselves equipped to handle this intricate venture with confidence.
Product Overview
When building a PC, understanding the various components is crucial. Each part has a specific function, and knowing which to choose is imperative for a successful build.
Key Features
Building a PC allows for customization, enabling users to select parts that cater to their specific needs—whether it’s gaming, graphic design, or general use. Key features to consider include:
- Processor: The brain of your PC; affects performance and speed.
- Graphics Card: Important for gaming and graphic-intensive tasks.
- RAM: Affects multitasking capability; more RAM allows for better performance.
- Storage: Options include SSDs for speed and HDDs for capacity.
- Motherboard: The backbone that connects all components.
Technical Specifications
Here are some essential specifications to consider in your build:
- CPU Clock Speed (measured in GHz)
- GPU Memory (GDDR6, GDDR5, etc.)
- Type and speed of RAM (DDR4, DDR5)
- Storage type (SSD vs. HDD)
- Power Supply wattage and certification (80 PLUS rating)
Pricing Information
Prices can vary significantly depending on the choice of components. A budget-friendly build may cost around $600, while a high-end gaming machine could exceed $2000. It is reasonable to allocate funds proportional to the performance you desire and the tasks you plan to accomplish.
Performance Analysis
Understanding performance metrics is vital to assessing how well your PC will function for your intended tasks.
Benchmark Results
Benchmarks provide a quantifiable measure of performance. Often, sites like PassMark or Cinebench offer insights on how different components score.
Real-World Use Cases
From gaming experiences to video editing performance, various configurations yield different results based on the components used. For instance, an AMD Ryzen processor tends to excel in multi-threaded applications.
Comparison with Competitors
When selecting components, it’s important to compare options. For example, the Intel Core i7 lineup often competes closely with AMD Ryzen products. Each has its strengths, depending on user needs and preferences.
Installation and Setup
Once you have your components, it’s essential to properly install and configure them.
Required Tools and Components
You will need:
- A Phillips screwdriver
- Anti-static wrist strap (recommended)
- Cable ties for organization
- Your chosen components (CPU, GPU, RAM, etc.)
Step-by-Step Installation Guide
- Preparation: Clear a workspace and gather tools.
- Install CPU: Gently place the CPU into the motherboard socket and secure it.
- RAM Installation: Insert RAM sticks in the designated slots.
- Mounting Motherboard: Secure the motherboard into the case with screws.
- Install GPU: Place the graphics card in the PCIe slot and secure it.
- Connect Storage: Attach SSD or HDD using proper cables.
- Power Supply Installation: Mount the power supply and connect it to components.
- Cable Management: Organize cables neatly to improve airflow.
- First Boot: Power the rig on and enter BIOS to check connections and settings.
Troubleshooting Common Issues
If the PC does not boot, check connections and ensure that all components are properly seated. Sometimes, reseating the RAM or GPU can resolve the issue.
Pros and Cons
Understanding the advantages and disadvantages of building a PC can help inform your decision.
Advantages of the Product
- Customizability to tailor performance.
- Potential for cost savings compared to pre-built systems.
- Greater understanding of technology and components.
Disadvantages or Limitations
- Requires time and research to ensure compatibility.
- The risk of components failing during the build process.
- Some ongoing maintenance is required post-assembly.
Who It’s Best Suited For
This guide is well-suited for tech enthusiasts, gamers, and anyone who desires a personalized computing experience. Individuals seeking detailed knowledge of their equipment will find great benefit as well.
Final Thoughts
Building a PC can be a rewarding experience, providing both utility and satisfaction. In summary, knowing your components, understanding the installation process, and being aware of the pros and cons are essential.
Summary of Key Points
- Customizing your PC allows for tailored performance.
- Accurate component selection is critical for a functioning setup.
- The assembly process involves a series of careful steps.
Recommendations for Potential Buyers
Before purchasing, assess compatibility between components and your budget. Research and read reviews on parts you are considering.
Future of the Technology or Product Line
As technology evolves, components will only become more efficient. Advancements in processors and graphics cards will allow for continued improvements in performance, particularly for gaming and professional workloads.
Knowledge and a careful approach lead to a successful and fulfilling PC build experience.
Understanding the Purpose of Building Your Own PC
Building your own PC can be a highly rewarding endeavor, offering a unique blend of personalization and performance. This section will delve into the motivations behind constructing a custom-built machine, illustrating how it caters to personal needs while providing practical benefits.
Advantages of Custom PC Building
When one considers the advantages of building their own PC, various factors come into play. A primary benefit is customization, which allows users to select components that align with their specific needs. This means you can choose the CPU, GPU, and RAM that cater precisely to your use case, be it gaming, video editing, or general productivity. Additionally, custom builds often provide better value for money, as individuals can prioritize critical components without spending on unnecessary features.
Another notable advantage is the improved performance. Custom-built PCs can outperform pre-built ones in many scenarios, especially if the user is knowledgeable about the component selection. You are more likely to get superior cooling solutions and component compatibility by handpicking parts. This can lead to enhanced longevity and reliability of your system.
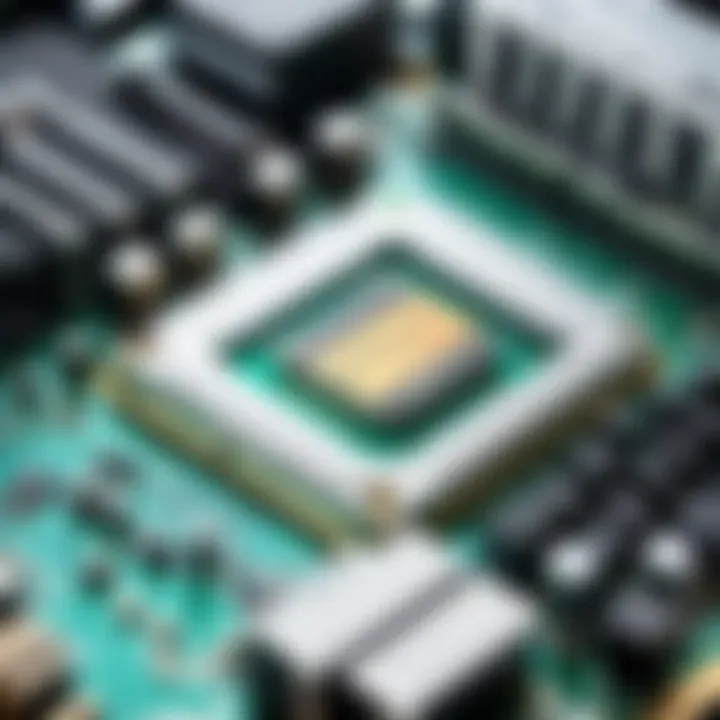
Moreover, the experience of building a PC is enlightening and fulfilling. Many users find that the process boosts their technical skills and understanding of hardware, making them more adept at troubleshooting and upgrading in the future. Just assembling a PC involves learning about different parts, compatibility issues, and how they work together. It can be a stepping stone for those interested in technology careers or gaming.
"A personalized PC can outperform pre-built systems, enhancing user experience and satisfaction."
By considering these advantages, potential builders can appreciate the numerous benefits that come with taking the DIY route.
Identifying Your Needs and Use Cases
Before embarking on this journey, it is crucial to identify your specific needs and use cases. This foundational step ensures that every choice you make regarding components and peripherals supports your objectives.
Consider your primary activities. Do you plan to play high-end games, engage in video production, or perhaps utilize software for tasks like graphic design or 3D modeling? Your answer will greatly influence component selection. For gaming, a robust graphics card is key, while video editing may demand a faster processor and additional RAM.
Additionally, your budget will play a vital role in determining which components you can afford. Be realistic about how much you are willing to invest. The market has a wide array of options, from budget builds meant for occasional use to high-end machines that push the limits of performance.
Moreover, it's essential to consider future needs. Technology evolves rapidly, and a machine built today should ideally have some level of upgradeability. Components like RAM and storage drives are typically easier to upgrade later if your needs change.
Essential Components of a PC
The essential components of a personal computer form the foundation upon which the performance, efficiency, and usability of the system are built. Understanding these components is crucial for anyone looking to construct a computer that meets their specific needs. Each part plays a distinct role, and selecting the right combination can lead to a remarkable computing experience. This section dives into primary components that every custom PC requires.
Central Processing Unit (CPU)
The Central Processing Unit, or CPU, serves as the brain of the computer. It executes instructions and processes data, playing a critical role in overall performance. The choice of CPU influences factors such as speed and multitasking capabilities. Modern CPUs come with multiple cores, allowing them to handle several tasks simultaneously, which is vital for gaming and content creation.
Motherboard
The motherboard is a complex circuit board that connects all components of a PC. It facilitates communication between the CPU, RAM, storage, and peripheral devices. When selecting a motherboard, consider compatibility with other components, available ports, and features such as onboard audio or Wi-Fi capability. A well-chosen motherboard enhances system stability and expands future upgrade options.
Random Access Memory (RAM)
Random Access Memory temporarily stores data that the CPU needs while running programs. More RAM allows for better multitasking and improved overall performance. In general, 16GB is a suitable amount for most users, while gamers or professionals might opt for 32GB or more. The speed of RAM, measured in MHz, also plays a role in system responsiveness.
Storage Solutions
Hard Disk Drives (HDD)
Hard Disk Drives offer a traditional form of storage, utilizing spinning disks to read and write data. They are available in larger capacities at lower prices compared to other storage options. This makes HDDs a cost-effective choice for users requiring significant storage, such as media libraries or backups. However, they are slower than alternatives, which can lead to long boot times and lag in loading applications.
Solid State Drives (SSD)
Solid State Drives, in contrast, use flash memory to store data, which results in far superior speed and reliability. They significantly reduce load times for the operating system and applications, enhancing user experience. While SSDs typically come at a higher cost per gigabyte, the performance benefits make them a popular choice for most builds. SSDs may also lead to increased battery lifspan and reduced physical wear in laptops.
Graphics Processing Unit (GPU)
The Graphics Processing Unit is essential for rendering images, especially in gaming or graphic design applications. A strong GPU can dramatically improve visual fidelity and performance in 3D applications. Users engaging in video editing or gaming should prioritize investing in a high-quality graphics card for optimal performance.
Power Supply Unit (PSU)
The Power Supply Unit converts electrical power from an outlet into usable power for the internals of the computer. An adequate PSU ensures stable and reliable operation. When selecting a PSU, consider its wattage rating and efficiency. A well-rated PSU can reduce energy consumption and heat generation, contributing to the longevity of components.
Computer Case
The computer case houses all internal components, providing protection and facilitating airflow for cooling. Cases come in various sizes and styles, impacting component compatibility. A good case allows for proper cable management, enhancing airflow and aesthetics. Choose a case that meets personal preferences while ensuring adequate space for future upgrades.
Cooling Systems
Air Cooling
Air Cooling relies on heatsinks and fans to dissipate heat generated by critical components. It is typically easier to set up and maintain. Air coolers can be very effective if properly configured. However, they might be less efficient at extremely high performance levels compared to liquid cooling systems.
Liquid Cooling
Liquid Cooling uses coolant to transfer heat away from components. This system can maintain lower temperatures, allowing the system to run quieter and potentially extending the lifespan of parts. However, installation can be more complex, and there is a risk of leakage. It may require more maintenance than air cooling solutions.
The selection of individual components determines the reliability, speed, and capability of your build. Invest time in researching and selecting the right parts to ensure a fruitful and enjoyable building experience.
Tools and Materials Required for Building a PC
Building a personal computer involves several crucial tools and materials. Having the right items at hand can make the entire assembly process smoother and more efficient. Without proper tools, the risk of damaging components increases significantly, which can lead to costly repairs or replacements. Therefore, it is essential to gather the necessary equipment before starting.
Screwdrivers and Hand Tools
When constructing a PC, a set of quality screwdrivers is indispensable. Most of the screws used within cases and components require a Phillips head screwdriver. A magnetic screwdriver can also be helpful, as it prevents screws from falling into hard-to-reach areas during assembly.
In addition to screwdrivers, you may need other hand tools, such as pliers and wire cutters. Pliers are useful for manipulating cables and connectors, while wire cutters can help you manage and trim excess cable lengths, ensuring a tidy setup. Investing in durable tools helps ensure that you will not need to replace them often.
Anti-Static Precautions
Static electricity poses a significant threat to sensitive electronic components, particularly when you handle parts like the CPU and RAM. To mitigate this risk, it is important to implement anti-static precautions. Wearing an anti-static wrist strap is one effective method, as it grounds you, preventing the buildup of static.
Another precaution is working on a non-static surface. Avoid building your PC on carpets or rugs, which can foster static buildup. Instead, choose a hard wooden or tile surface. Keeping components in their packaging until you are ready to install them is also beneficial, as this provides an additional layer of protection.
Important: Always remember to touch a grounded metal object before handling components to discharge any static electricity.
Cable Management Supplies
Effective cable management is essential for a clean and efficient PC build. It affects airflow and can impact cooling performance, which is critical for maintaining optimal temperatures during operation. To ensure you manage your cables well, you may consider using cable ties or Velcro straps. These supplies can help group and secure cables neatly, preventing clutter.
Cable sleeves are also an option for a more polished appearance. They can hide unattractive cables while improving airflow and aesthetics. Therefore, allocate sufficient time to plan your cable management strategy, considering which cables will need the most attention.
Selecting Compatible Components
Understanding how to select compatible components plays a vital role in building your PC. Every element within a computer must work seamlessly with others to ensure optimum performance. Errors in component selection can lead to frustrations during assembly and potential malfunctions afterward. Thus, a fundamental knowledge of the compatibility requirements becomes crucial. This section emphasizes why compatibility matters, outlines various factors to consider, and suggests resources that can facilitate the selection process.
Understanding Compatibility Requirements
Compatibility requirements involve several critical elements. The foremost is ensuring that the central processing unit (CPU) is compatible with the motherboard. Each CPU has a specific socket type. Assessing the motherboard's specifications is necessary to confirm this match. Some motherboards can support multiple CPU generations, while others are more restrictive.
Additionally, RAM compatibility is essential. Not all RAM types work with all motherboards. Often, the motherboard will have limitations on the maximum amount of RAM supported, as well as preferred RAM speeds. Ensuring these details align can bolster overall system performance.
The power supply unit (PSU) is also a key component in ensuring compatibility. It must provide adequate wattage for your CPU and GPU. Checking the PSU’s connectors is also essential; certain components require specific connecter types to function.


Storage solutions, such as SSDs and HDDs, must consider connection interfaces. For instance, SATA drives are not interchangeable with M.2 drives without the right motherboard configurations.
Lastly, the case size matters. It must accommodate the motherboard type, such as ATX or Micro-ATX, alongside other components like GPUs and cooling systems. If the case is too small, components may not fit.
Resources for Checking Compatibility
Several resources are available that simplify the compatibility-checking process. Websites like PCPartPicker.com allow users to build a virtual PC, showing real-time compatibility alerts as components are added. This helps in understanding which parts will work together effectively.
Another useful tool is manufacturer specifications. Companies like ASUS, MSI, and Gigabyte provide detailed documentations on motherboard specifications, letting users cross-reference CPU support and RAM capacity directly.
Community forums such as Reddit can be invaluable. Specific subreddits like r/buildapc provide insights from experienced builders who share their recommendations and troubleshooting experiences. Engaging with these communities can supplement your understanding of the compatibility landscape.
Lastly, some enthusiasts might turn to YouTube for tutorials and reviews on particular components. Watching assembly videos can offer visual context to the specifications and compatibility checks discussed.
Always double-check component compatibility before making a purchase. Understanding your hardware requirements can save time and resources during the building process.
Assembling the PC: A Step-by-Step Guide
Building a PC is not only about gathering components; it is about assembling them in a methodical manner. This section will guide you through the important steps. You will learn how each part fits together, ensuring the functionality of your new machine. Following a structured process minimizes errors and enhances your understanding of hardware. Such knowledge can be valuable in troubleshooting down the line.
Preparing the Workspace
Before you begin to assemble your PC, it is crucial to prepare your workspace. A clean and organized area helps prevent mistakes and protects sensitive components. Here are some tips for preparing your workspace:
- Choose a flat surface free of clutter.
- Ensure proper lighting to see small parts clearly.
- Gather necessary tools, such as screwdrivers and pliers.
- Have a container for screws to avoid losing them.
- Maintain a static-free environment to protect components.
Consider using an anti-static wrist strap during the assembly process. This will ground you and minimize the risk of static discharge damaging your components.
Installing the CPU
The Central Processing Unit (CPU) is the brain of your computer. Installing it properly is vital. First, check the CPU socket on the motherboard for alignment. Lower the CPU gently into the socket without forcing it. Ensure it is seated correctly, then lock it in place following the specific instructions for your motherboard.
Here are the steps:
- Gently lift the socket lever.
- Align the CPU so that the notches match the socket configuration.
- Place the CPU into the socket.
- Lower the lever to secure it.
Be cautious; dropping or mishandling the CPU can cause damage.
Installing the RAM
Random Access Memory (RAM) is essential for multitasking capabilities. Begin this step by locating the RAM slots on the motherboard. Most motherboards have specific slots recommended to use for dual-channel configuration. Align the RAM module with the notch in the slot, then press down firmly until it clicks into place. Repeat this process for additional sticks.
To summarize:
- Open the clips on each RAM slot.
- Align the module with the notch.
- Press down until the clips snap.
Make sure the RAM is compatible with your CPU and motherboard.
Mounting the Motherboard
The motherboard serves as a foundation for all components. To mount it: first, install standoffs in your computer case. Then, carefully place the motherboard over these standoffs. Align the screw holes and secure the motherboard with screws. It is important to use the right screws to avoid damage. Ensure no wires or components get pinched under the motherboard.
Installing Storage Drives
Storage is necessary for your files and applications. Most users prefer Solid State Drives (SSDs) for speed, while Hard Disk Drives (HDDs) offer more space for a lower price. Depending on the case, either mount the drive in specific bays or use screws to secure it. Connect the SATA cables to both motherboard and storage device. Ensure that they are firmly connected.
- Secure the drives in place.
- Connect SATA power from the PSU.
Consider your needs when selecting storage solutions.
Installing the GPU
The Graphics Processing Unit (GPU) enhances visual performance. Begin by locating the PCIe slot on the motherboard. Carefully align the GPU with the slot and press it down firmly until it clicks into place. Secure it to the case with screws provided. Connect any necessary power cables from the PSU to the GPU to ensure it receives adequate power to operate efficiently.
Connecting the Power Supply
The Power Supply Unit (PSU) delivers power to all components. When connecting the PSU, follow these steps:
- Position the PSU in the case and secure it with screws.
- Connect the 24-pin main power cable to the motherboard.
- Attach the 8-pin CPU power cable near the CPU socket.
- Ensure that all necessary cables for components like storage and GPU are connected.
Checklist:
- Ensure all cables are well-connected.
- Neatly manage cable routing to avoid clutter.
Managing Cables for Optimal Airflow
Cable management is significant for airflow and aesthetics. Tidying cables helps maintain a clean build and prevents overheating from obstructed airflow. Use cable ties or Velcro straps to secure cables along the edges of the case. Evaluate if any cables can be rerouted behind the motherboard tray for a cleaner look.
Proper management aids in cooling efficiency and makes future upgrades simpler.
Proper cable management not only enhances aesthetics but also promotes better computer performance through efficient airflow.
Following these steps in detail improves your chances of success in assembling a reliable PC. Each step builds on the previous one, culminating in a functional and efficient machine that can meet your computing needs.
Configuring the BIOS Settings
Configuring the BIOS is a crucial step in the process of building a PC. The Basic Input/Output System (BIOS) is the firmware that initializes and tests the system hardware during the booting process. Proper configuration can lead to optimized performance and stability. Without this step, even the best components may underperform or fail to work together efficiently.
Accessing the BIOS
Accessing the BIOS is typically done during the initial boot of the computer. You will usually need to press a specific key, such as Del, F2, or Esc, right after turning on the system. The exact key may vary depending on the motherboard manufacturer. Once accessed, you will enter a menu that allows you to manage various settings.
- Timing is key: You usually have a small window of opportunity to hit the key before the operating system begins to load. If you miss it, a simple restart is all it takes.
- Look for instructions: Often, you can see prompts on the bottom or top of the screen indicating which key to press to enter setup.
Setting the Boot Order
Setting the boot order determines the sequence in which your system looks for devices to boot from. This is particularly important after installing your operating system. For instance, you may want to boot from a USB drive at first.
- Enter the BIOS: After accessing the BIOS, navigate to the Boot menu.
- Select Devices: You will see a list of devices. Each device, such as hard drives or USB drives, will be listed with a priority level.
- Adjust Priority: Use your keyboard to move your preferred device to the top of the list. This is usually done with the arrow keys and specific prompts for adjustments.
- Save Changes: Remember to save your settings before exiting, usually done by pressing F10.
The boot order must be set correctly to ensure the system boots from the right source and operates as expected.


Updating BIOS Firmware
Regularly updating your BIOS firmware can improve system stability and compatibility with new hardware.
- Check Current Version: When accessing the BIOS, your current firmware version should be displayed.
- Visit Manufacturer's Website: Go to the motherboard manufacturer's site to see if a newer version is available.
- Download and Prepare: Download the update and place it on a USB drive formatted in FAT32.
- Boot into BIOS: Restart your computer and re-enter the BIOS.
- Find Firmware Update Option: Look for an option related to Firmware Update, Flash BIOS, or similar.
- Follow Prompts: Select the update file from your USB drive and proceed with the update as directed.
It is crucial to follow these steps carefully, as a failed BIOS update can render your motherboard useless.
Lastly, always ensure you have backups of important data before making changes to the BIOS. This step can save you time and trouble should anything go wrong.
Installing Operating System and Drivers
Installing the operating system and drivers is a crucial phase in building a personal computer. This process is key to ensuring that the hardware components of your PC work harmoniously together and that you can conduct your tasks efficiently. Without a proper OS and drivers, your system may not function as intended, limiting its capabilities.
Choosing the Right Operating System
Selecting the appropriate operating system is pivotal to the overall performance and usability of your PC. Different operating systems cater to varying needs depending on the user’s goals.
- Windows: Known for its extensive software compatibility and user-friendly interface, Windows is widely preferred by gamers and general users alike. The current version, Windows 11, offers enhancements for gaming, multitasking, and security.
- Linux: For those seeking an open-source option, Linux provides customization and compatibility with programming environments. There are numerous distributions tailored for various needs, from Ubuntu for everyday users to Arch Linux for advanced users.
- macOS: If you plan to build a Hackintosh or require specific applications exclusive to Apple's ecosystem, macOS might be your choice. It offers a polished interface and is preferred by creative professionals for its software suite.
Consider your specific requirements. Are you gaming, programming, or just browsing? Your choice can greatly impact performance and user experience.
Installing Drivers for Hardware
Drivers are software that enable the operating system to communicate with hardware components. Installing the correct drivers is essential to ensure that all hardware functions optimally.
Steps to Install Drivers
- Identify Hardware: Make a list of all the components in your PC (CPU, GPU, motherboard, etc.). This information can often be found in the manufacturer’s documentation or online.
- Visit Manufacturer Websites: Go to the official websites of the hardware manufacturers. Look for their support or downloads section.
- Download the Latest Drivers: Download the appropriate drivers for each component. It is vital to select the versions compatible with your OS to avoid conflicts.
- Install the Drivers: Follow the installation prompts for each driver. Generally, this process is straightforward—an installation wizard will guide you through it.
- Restart Your PC: After installing all drivers, a restart ensures that all changes take effect and that components are recognized by the OS.
Ensure that you frequently check for driver updates post-installation to maintain system performance and compatibility with new applications.
By carefully choosing the right operating system and ensuring your drivers are up-to-date, you set the stage for a powerful and functional PC that meets your specific needs.
Testing and Troubleshooting Your Build
Testing and troubleshooting are critical steps in the PC building process. After assembling the components, it is essential to ensure that everything operates correctly. This phase helps identify potential issues early, preventing future headaches. Proper testing can ensure system stability, functionality, and optimize performance. Understanding common troubleshooting techniques allows users to address problems efficiently, enhancing their overall experience with the newly built machine.
Initial Power-On Tests
Initial power-on tests mark the first significant moment in your PC building journey. Upon completing the assembly, the first step is to connect the power supply unit and switch on the machine. Pay close attention to indicators such as fan rotations, LED lights, and other responses from the hardware. These initial signs help verify that the components receive power and are functioning properly.
- Listen for Beeps: Many motherboards use a beep code on startup to indicate the status of the machine. If a series of beeps occurs, refer to the motherboard manual for troubleshooting guidance.
- Check Connections: If the system doesn’t power on at all, inspect all connections again. Ensure that the PSU cables are firmly connected to the motherboard and components.
- Monitor Display Output: If the system powers on but displays nothing on the screen, check the connection between the GPU and the monitor. Ensure appropriate cables are extended between them.
It is vital to remain calm during initial power-on tests. Not all issues will result in failure. Keep a reference manual close to guide you through any uncertainties.
Common Issues and Solutions
Despite meticulous assembly, some issues may arise during or after the initial testing. Understanding common issues can streamline your troubleshooting process. Here are some typical problems encountered and pragmatic solutions:
- No Power: If the PC does not respond at all, ensure the power supply switch is turned on, and the unit is connected to a working outlet. If those do not work, consider trying a different power supply unit.
- No POST (Power-On Self-Test): If the machine powers but fails to boot, check if all components, including RAM and GPU, are seated correctly. Reseat them if necessary.
- Boot Loop: Should your computer restart continuously, this issue may stem from hardware errors. Disconnect all peripherals and boot with minimal components to isolate the problem.
- Temperature Alerts: Overheating can be avoided by ensuring the cooling systems are properly set up. Check whether fans are operational and that there is adequate airflow within the case.
Following the solutions mentioned above can help in resolving many of the initial hiccups faced. Knowledge of these can facilitate smoother running of your system and minimize downtime, allowing you to enjoy your build to the fullest.
Maintaining Your PC for Longevity
Maintaining your PC is essential for ensuring its performance and longevity. A well-maintained computer runs efficiently and can save you money in the long run. Regular maintenance also extends the lifespan of your components, reducing the need for costly upgrades or replacements. Here, we will discuss the significance of maintaining your PC and focus on two critical aspects: regular cleaning and upgrading components over time.
Regular Cleaning and Dusting
One of the fundamental aspects of PC maintenance is regular cleaning. Dust accumulation can lead to overheating, which puts stress on hardware components. A clean PC operates cooler and more efficiently.
Why Clean?
- Heat Management: Components such as the CPU and GPU generate heat during operation. Dust blocks airflow, causing components to overheat.
- Performance: A clean system experiences less thermal throttling, which is when CPUs or GPUs reduce their speed to avoid overheating. This allows for better performance.
- Aesthetics: A clean PC looks better and is more inviting to work with.
Cleaning Process
- Power Off: Always turn off and unplug your computer before cleaning.
- Use Compressed Air: Carefully blow out dust from the components. Pay attention to the fans and heatsinks, as they collect a lot of dust.
- Wipe Surfaces: Use a microfiber cloth to wipe down surfaces, avoiding any liquid cleaners that could damage electronic components.
- Regular Schedule: Make cleaning a habit—every six months is a good interval.
Upgrading Components Over Time
Another significant strategy for maintaining your PC is upgrading components as needed. As technology advances, new hardware becomes available that can enhance your system's performance, efficiency, and capabilities.
Identifying Upgrade Opportunities
- Performance Bottlenecks: Regularly assess your system's performance. If it’s slowing down, check for hardware that might need an upgrade, such as RAM or GPU.
- Emerging Technology: Keep an eye on advancements in technology. Newer CPUs and SSDs can significantly improve speed and responsiveness.
- User Needs: Evaluate your changing needs. Gamers may require a more powerful GPU, while professionals might need additional RAM for heavy applications.
Benefits of Upgrading
- Cost-Effectiveness: Upgrading specific components can be more economical than purchasing a completely new system.
- Enhanced Capability: Improved components increase your system's efficiency, allowing it to handle more demanding tasks.
- Future-Proofing: Regular upgrades help in keeping your system relevant as software requirements grow.
Regularly maintaining and upgrading your PC is not just about improving performance but also about prolonging the life of your hardware. While it may require time and effort, the benefits greatly outweigh the costs.
Exploring Advanced Customization Options
When building a personal computer, many users aim for a system that performs well for their specific needs. Exploring advanced customization options allows builders to enhance the performance and tailor their setup based on their unique interests. Whether it's for gaming, content creation, or general productivity, customization plays a crucial role in optimizing a PC for concrete tasks.
Overclocking the CPU and GPU
Overclocking is one of the primary methods of enhancing system performance beyond the manufacturer’s specifications. By increasing the clock speed of both the CPU and GPU, users can achieve better performance in applications that require more computational power. This is especially beneficial for gamers and professionals who rely on high frame rates and quick processing.
However, overclocking comes with risks. It generates more heat and can lead to instability if not executed properly. It's crucial to have robust cooling solutions in place, avoiding overheating and potential damage. Users often employ software tools for monitoring temperatures and adjusting settings safely. Here are some benefits and considerations:
- Enhanced Performance: Overclocking can noticeably improve frame rates in games.
- Temperature Monitoring: Keeping an eye on temperatures is essential to prevent hardware failure.
- Stable Power Supply: An adequate power supply is necessary to support higher performance needs.
- Technical Knowledge: A solid understanding of BIOS settings and risks involved is critical.
To safely overclock, practical experience and community resources, like forums on reddit.com, can be invaluable to learn appropriate techniques and settings.
Specialized Cooling Solutions
Once a user decides to overclock, specialized cooling solutions become paramount. Standard cooling might not suffice for the increased heat output, especially in high-performance builds. Developers offer a variety of options tailored to meet the demands of overclocking.
- Air Cooling: Often the go-to choice, air coolers utilize large heat sinks and fans. They are typically easy to install and compatible with most cases. Here’s what to consider:
- Liquid Cooling: More sophisticated cooling solutions involve liquid. These systems can better manage heat efficiently, leading to improved performance. Consider the following:
- Cost-effective and widely available.
- Suitable for moderate overclocking.
- Can be noisy, depending on fan speed.
- AIO (All-In-One): Preassembled units that simplify installation. They are optimal for new builders.
- Custom Loops: Provide high performance but require more effort to set up. They allow for more efficient cooling but can be complex.
- Enhanced aesthetics for those who value the visual aspect of their build.


